List Groups
Overview
List Groups provide a way to logically organize lists within the Codex Catalog.
Each list must belong to a group. Groups make it easier to navigate, filter, and manage permissions across multiple lists.
By default, new lists are assigned to the Default group, but owners can select or change the group when creating or editing a list.
Purpose & Use Cases
- Organization — Keep related lists together (e.g., Reference Lists, Customer Data, Approvals).
- Filtering — Use the Group field to quickly locate lists within the same category.
- Permissions — Apply roles to multiple lists grouped under specific categories, simplifying access management.
- Clarity — Help teams easily understand the purpose of each list by its context.
Where to Find List Groups
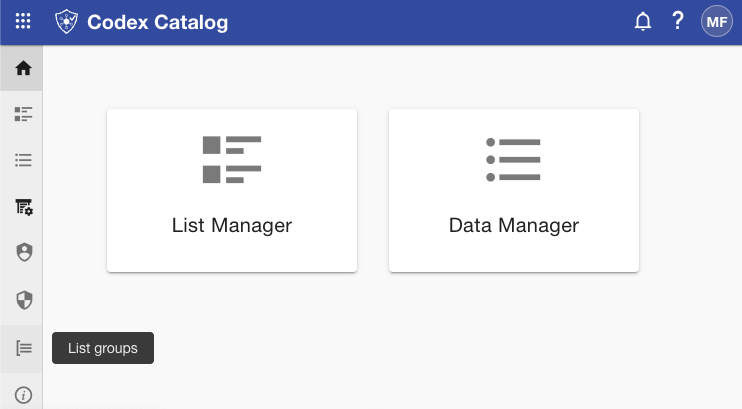
You can access List Groups from the Sidebar.
First, click on Manage.
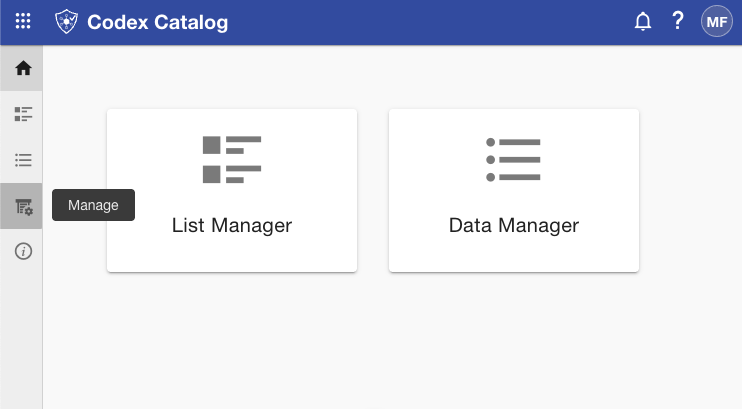
Then, select List Groups.
This will open the List Groups view, where you can see all existing groups.
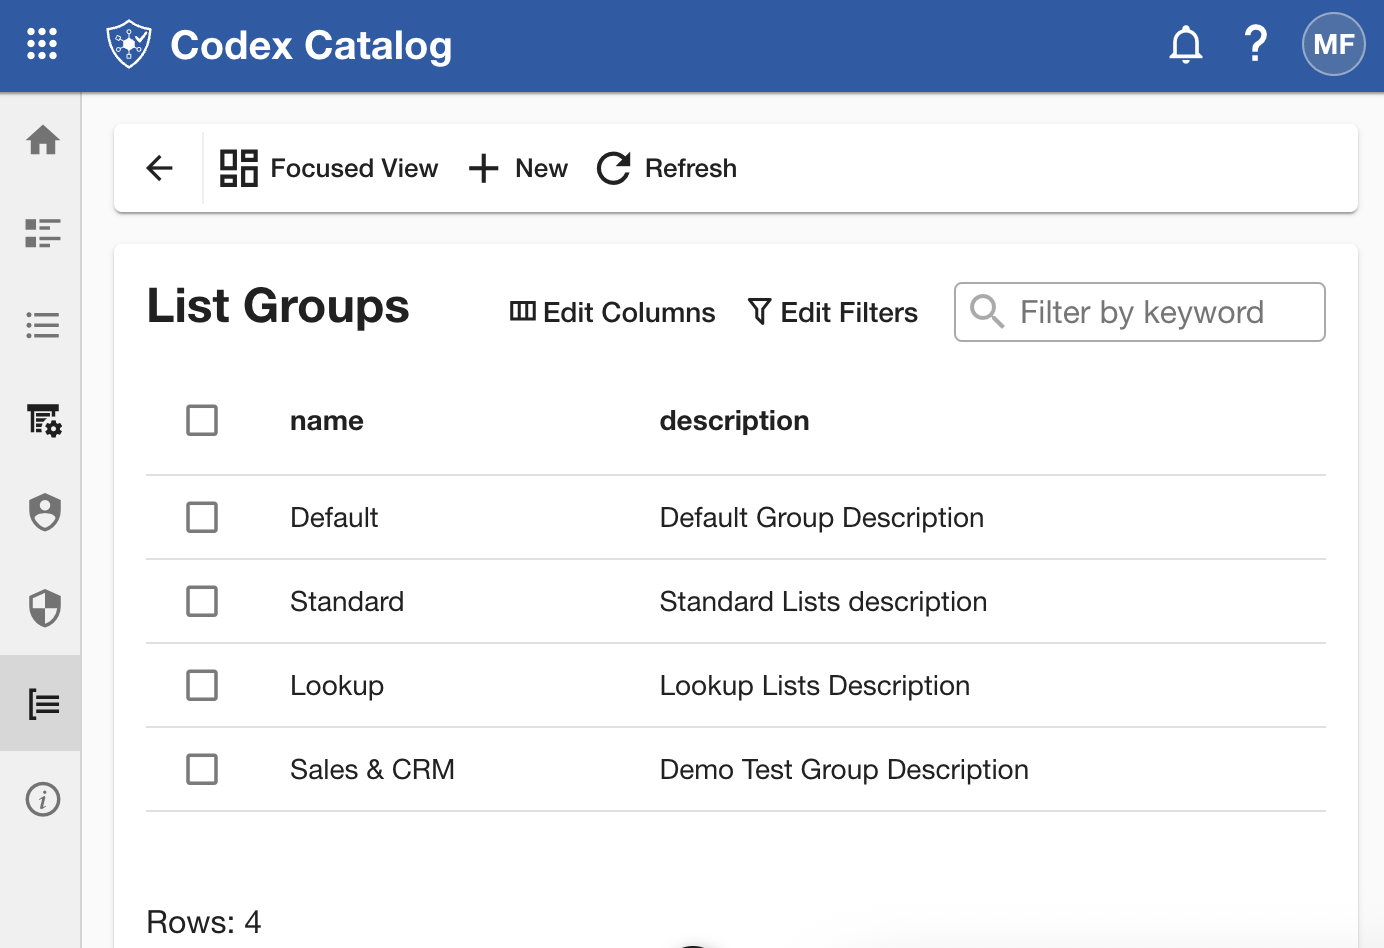
Depending on your permissions, you can review, assign, or create new groups from this screen.
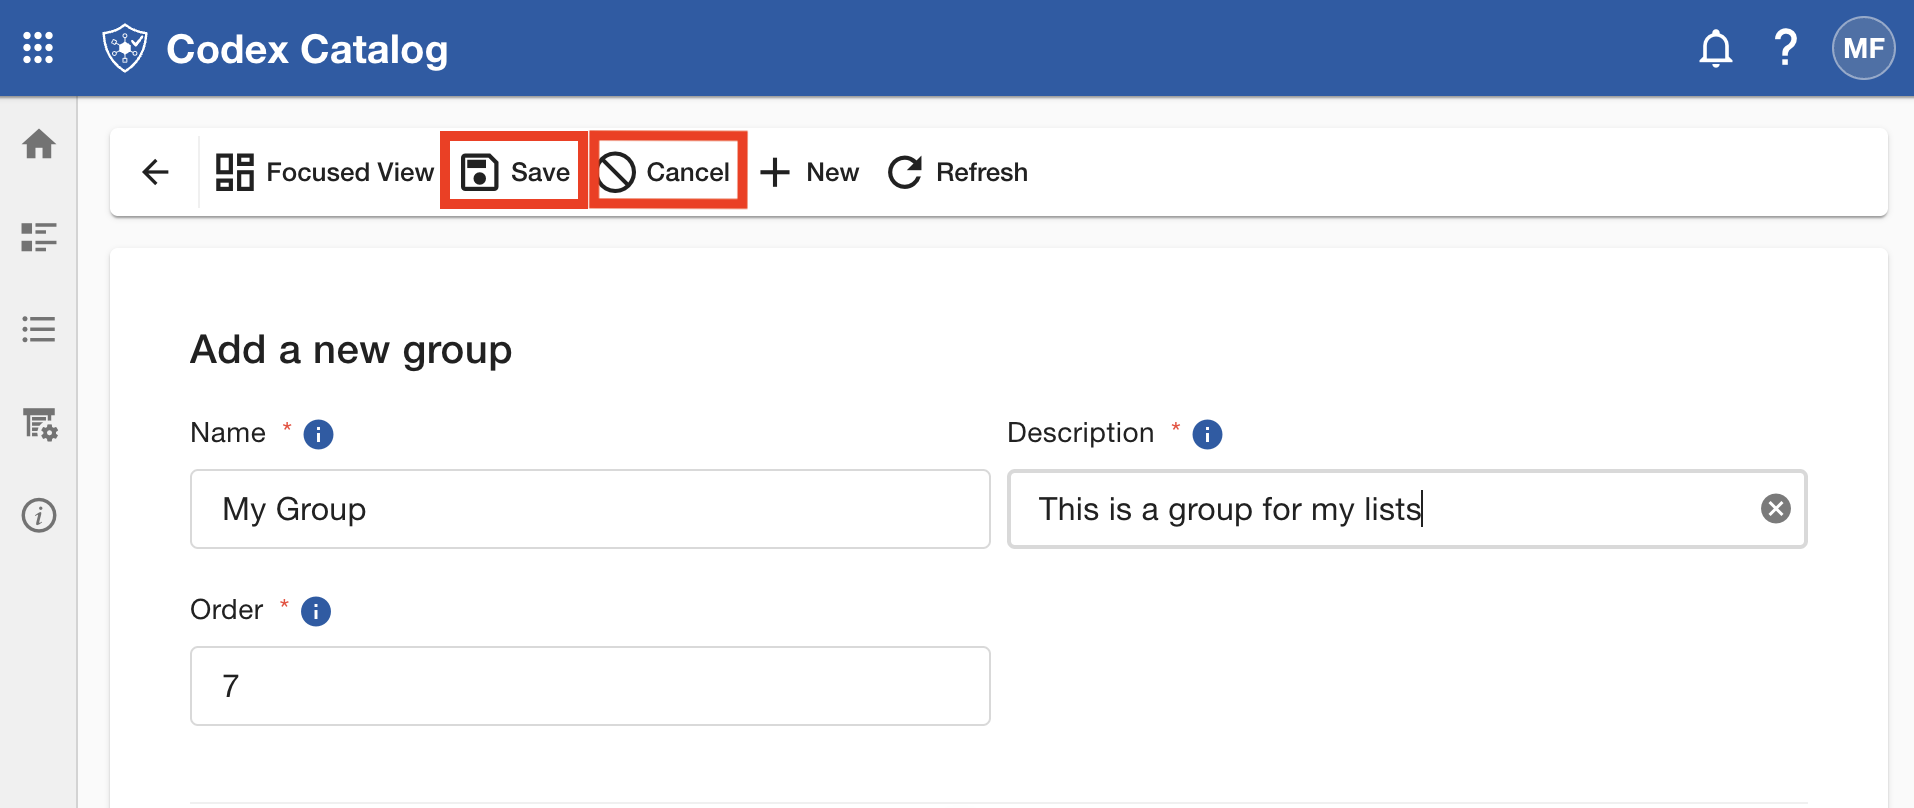
Create a List Group
-
Open List Groups from the Sidebar → Manage → List Groups as explained.
-
Click + New on the Page Toolbar.
-
Fill in the group details.
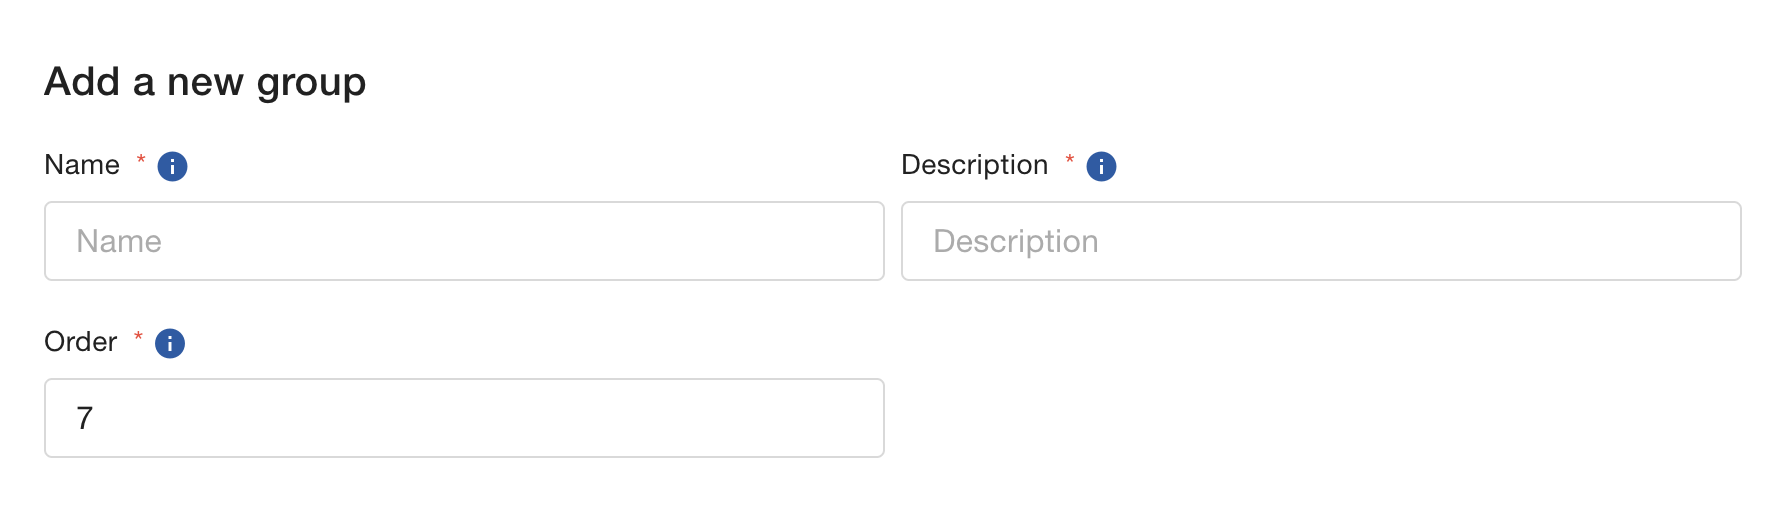
You need to fill in the following:
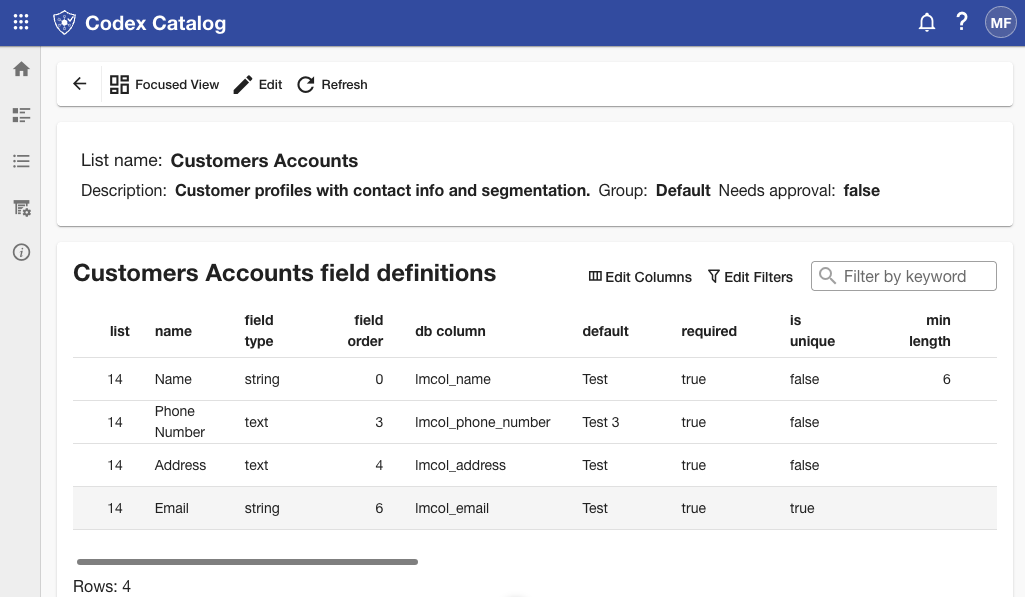
Field Description Name Descriptive name for the group (minimum of 3 characters). Description Short explanation of the group’s purpose (minimum of 3 characters). Order Automatically assigned, but can be adjusted manually if needed. -
Click Save to confirm, or Cancel to discard the creation.
Once created, the new group will appear in the list and can be assigned to lists from the List Manager or during list creation in the Create List form.
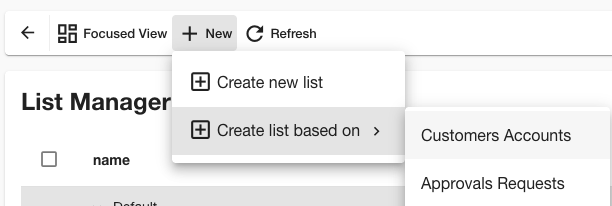
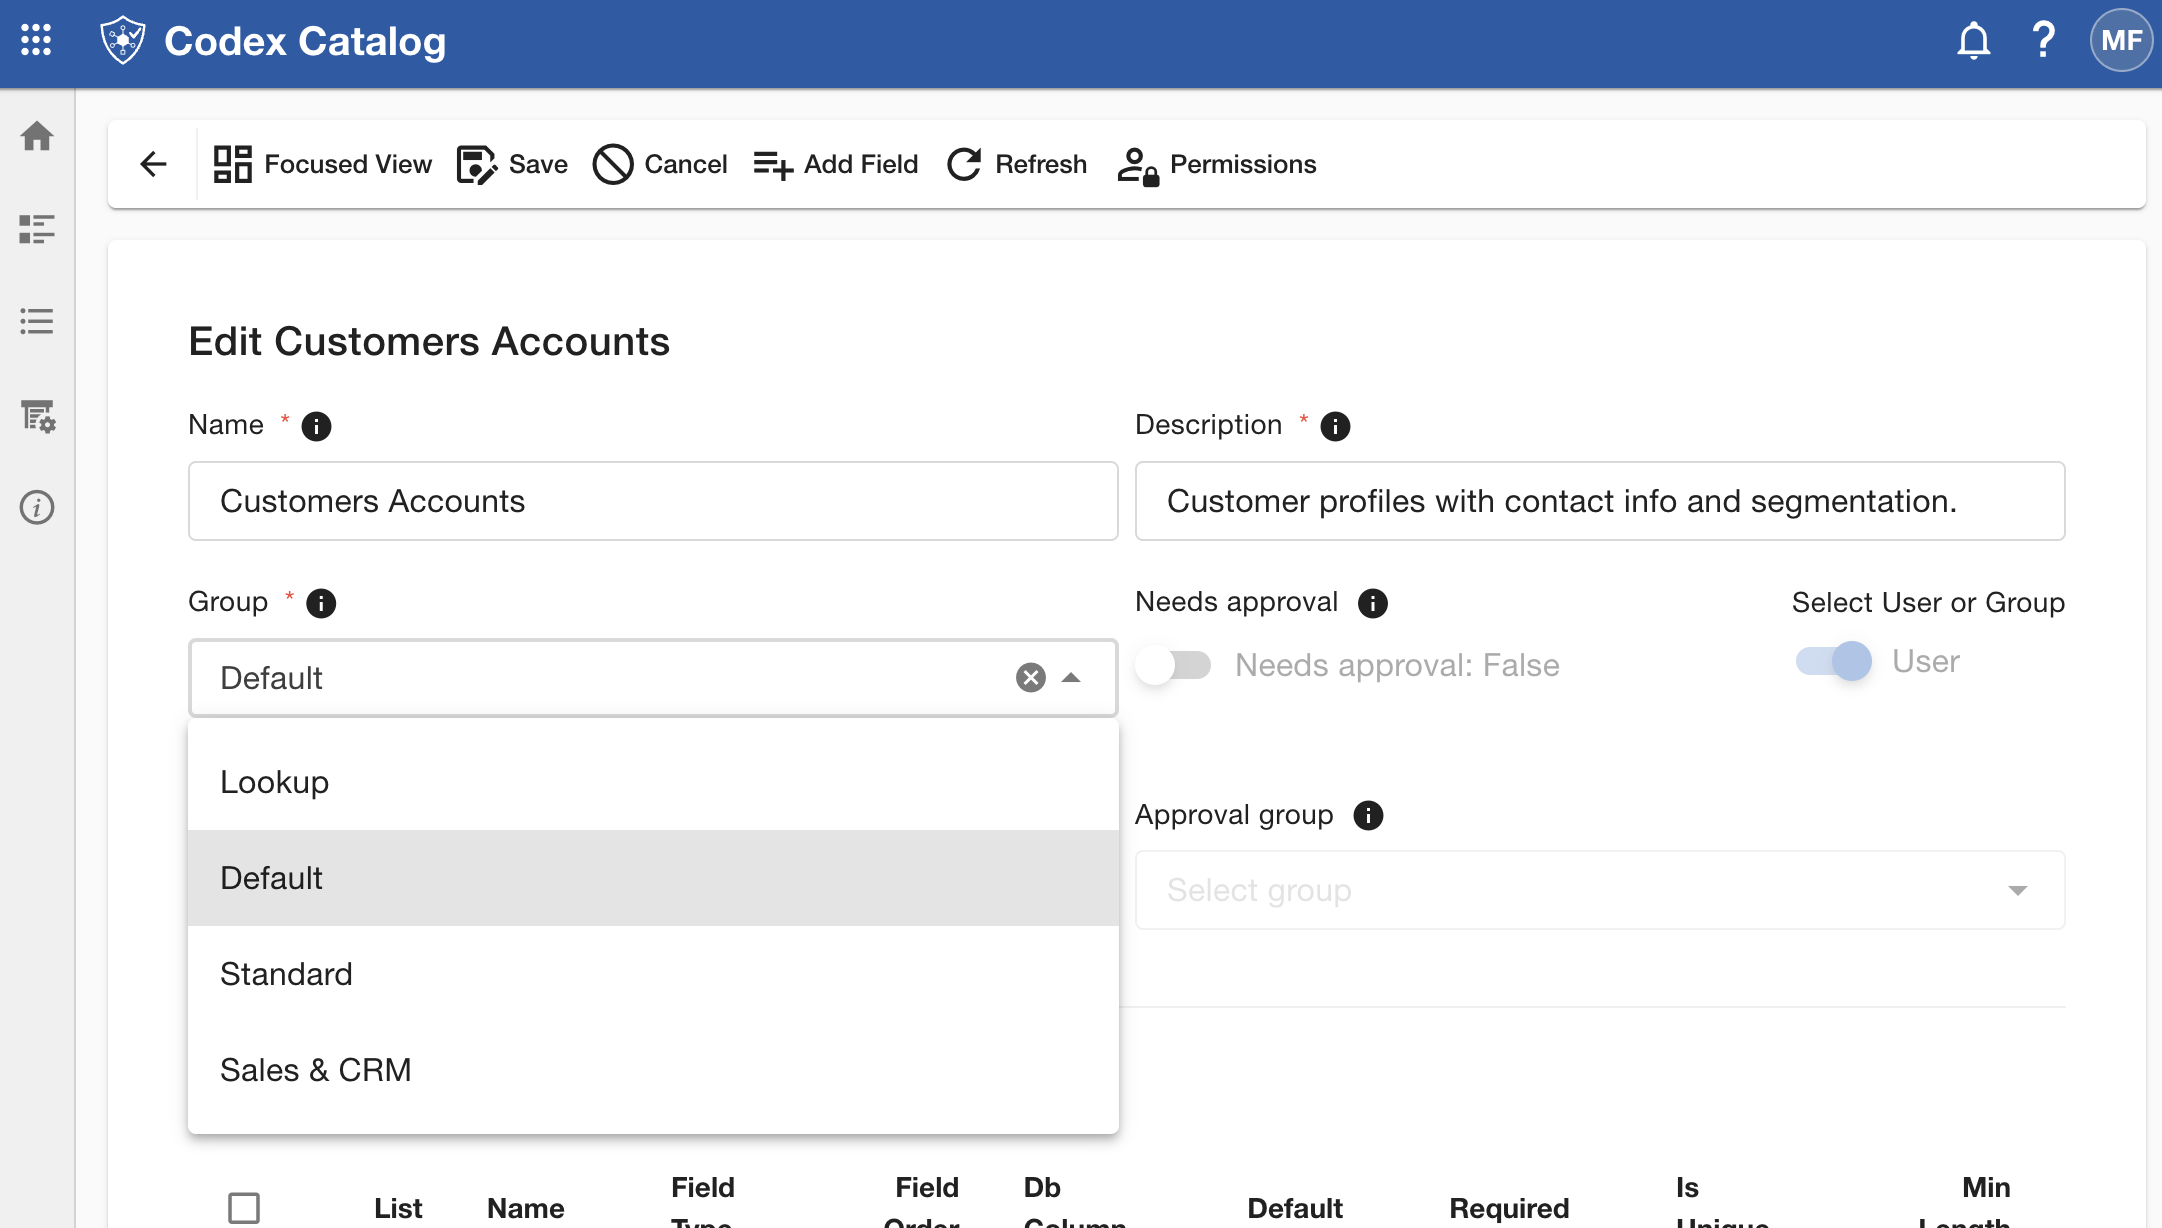
Assign a Group When Creating a List
-
Open the List Manager, click the + New button in the Page Toolbar , then Create a new list using any of both available options - as indicated in the first steps of Create a List.
-
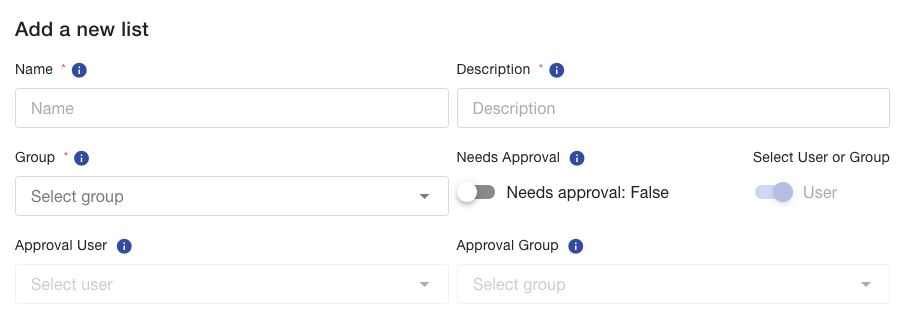
In the header form, select the Group field.
-
Choose an existing group or keep Default.
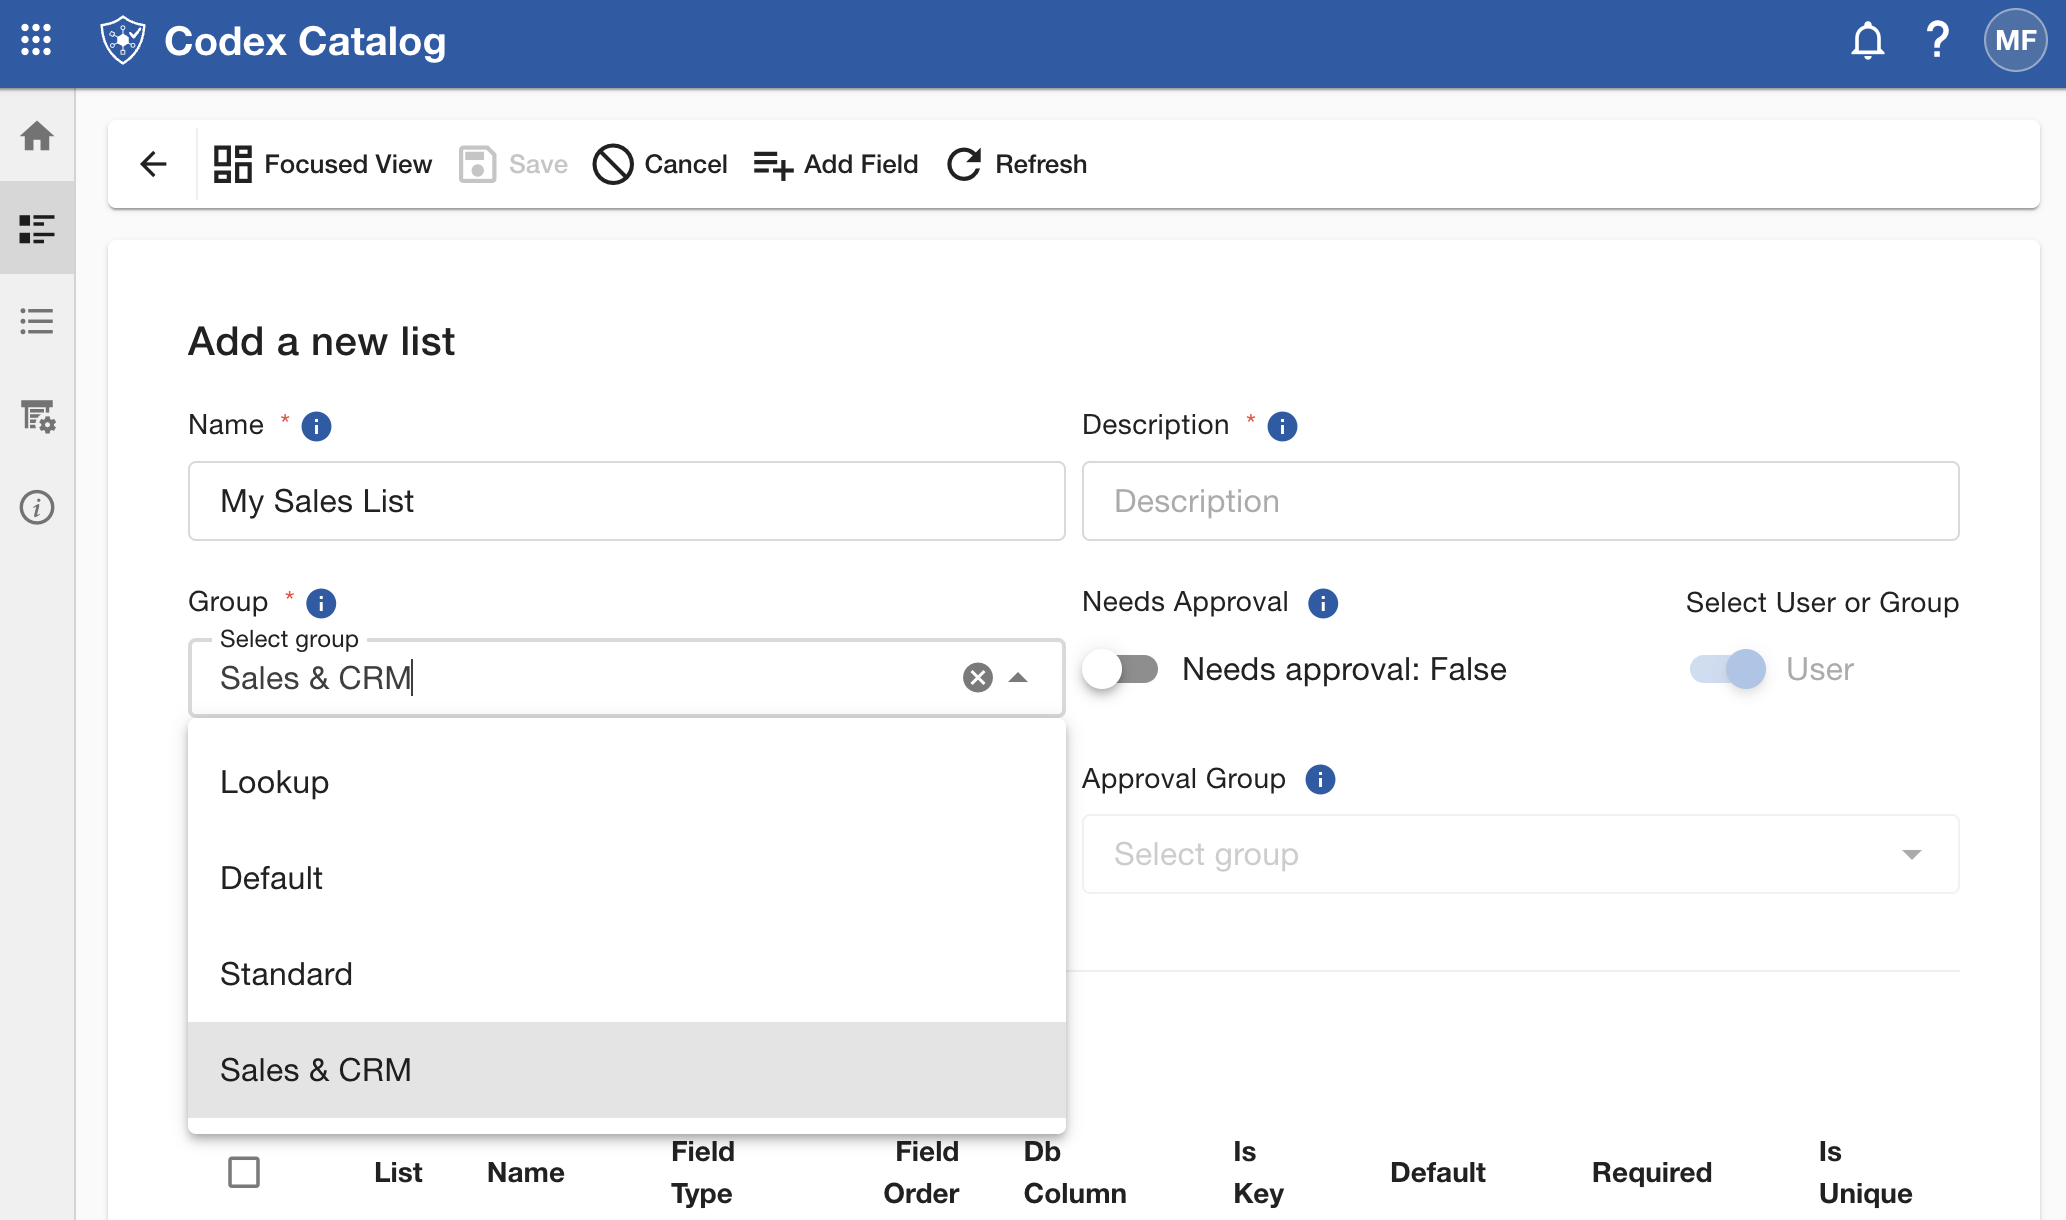
Remember: A list can only belong to one group at a time.
Change the Group of an Existing List
-
Open the List Manager, click the + New button in the Page Toolbar , select a list and click on Edit - as indicated in the first steps of Create a List. This requires Owner, Manager or higher permissions.
-
In the Information section, update the Group field.
-
Click on Save in the Page Toolbar to persist changes.
Best Practices
- Use clear, descriptive group names (e.g. Reference Codes).
- Avoid creating too many groups; keep the structure simple.
- Assign related lists to the same group for easier filtering and reporting.
Edit a List Group
-
Open List Groups from the Sidebar → Manage → List Groups as explained.
-
Select the group you want to modify from the list.
-
Click Edit on the Page Toolbar.
-
Update any of the following fields as needed:
- Name — Update the group’s display name (must contain at least 3 characters).
- Description — Update the short explanation of the group’s purpose.
- Order — Reorder the group manually if necessary.
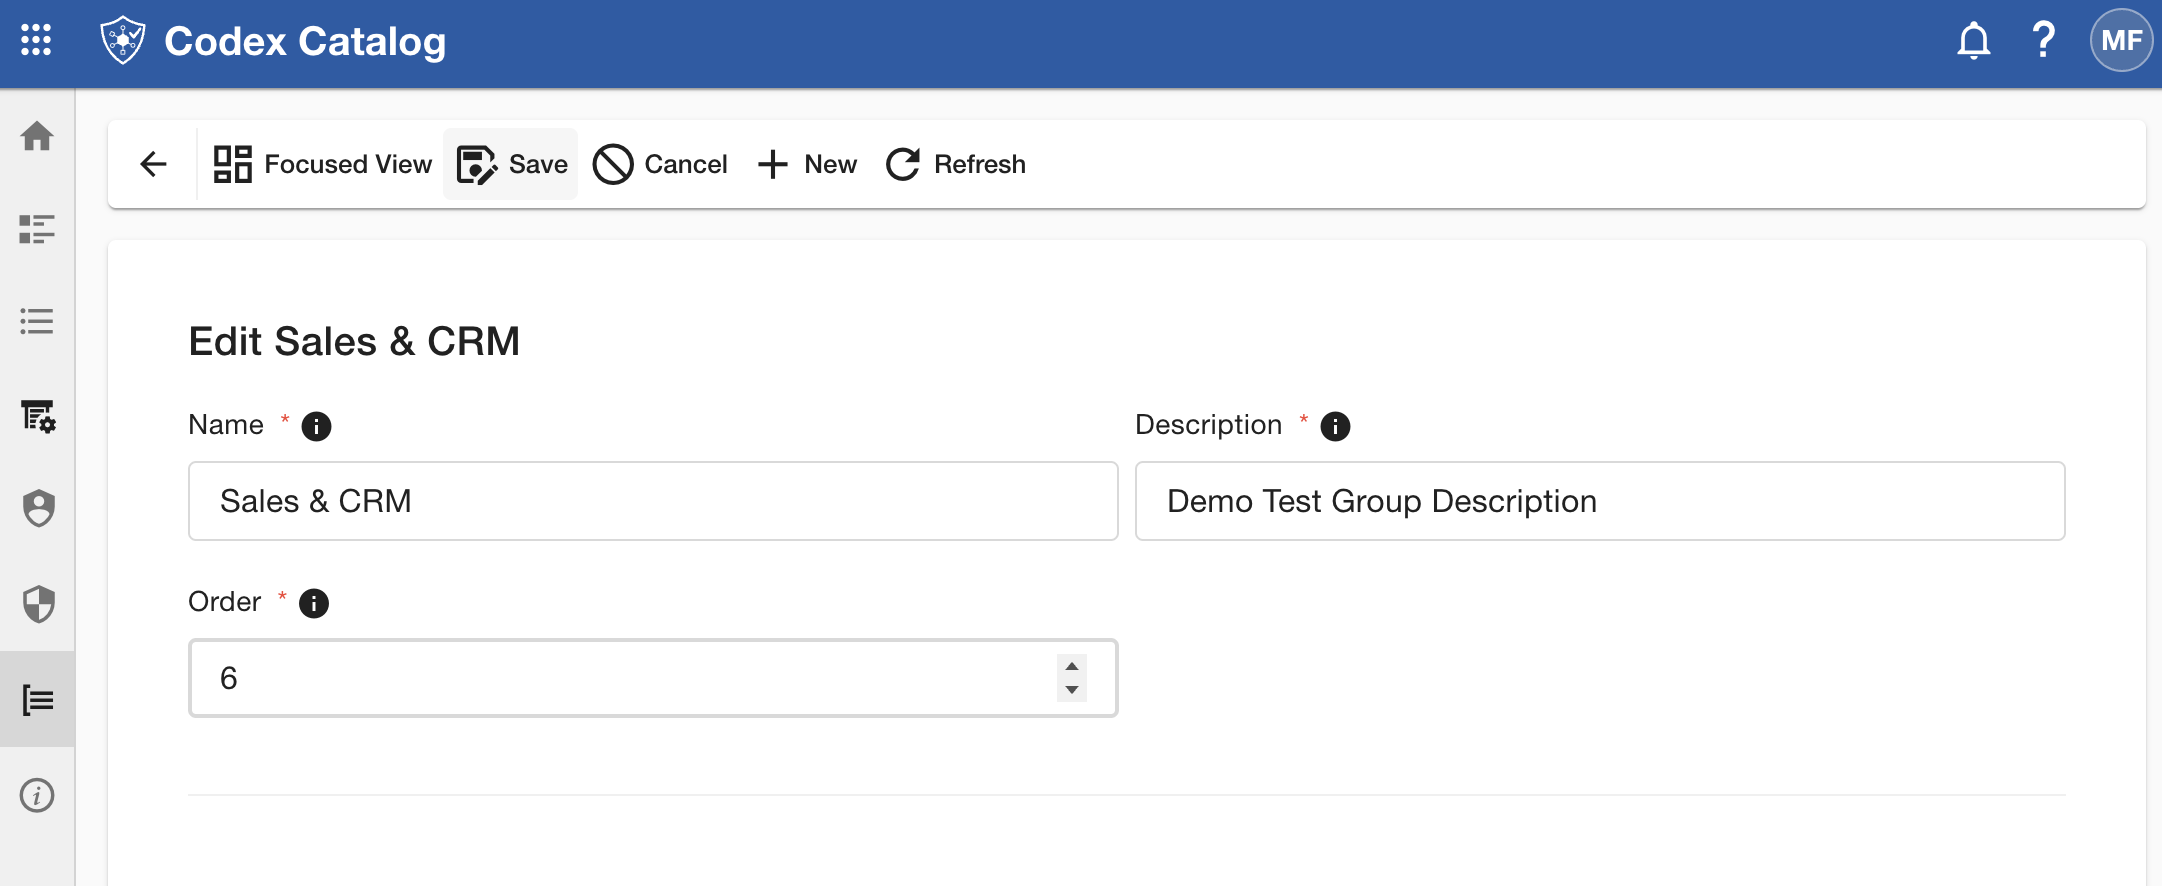
-
Click Save to confirm your changes, or Cancel to discard them.
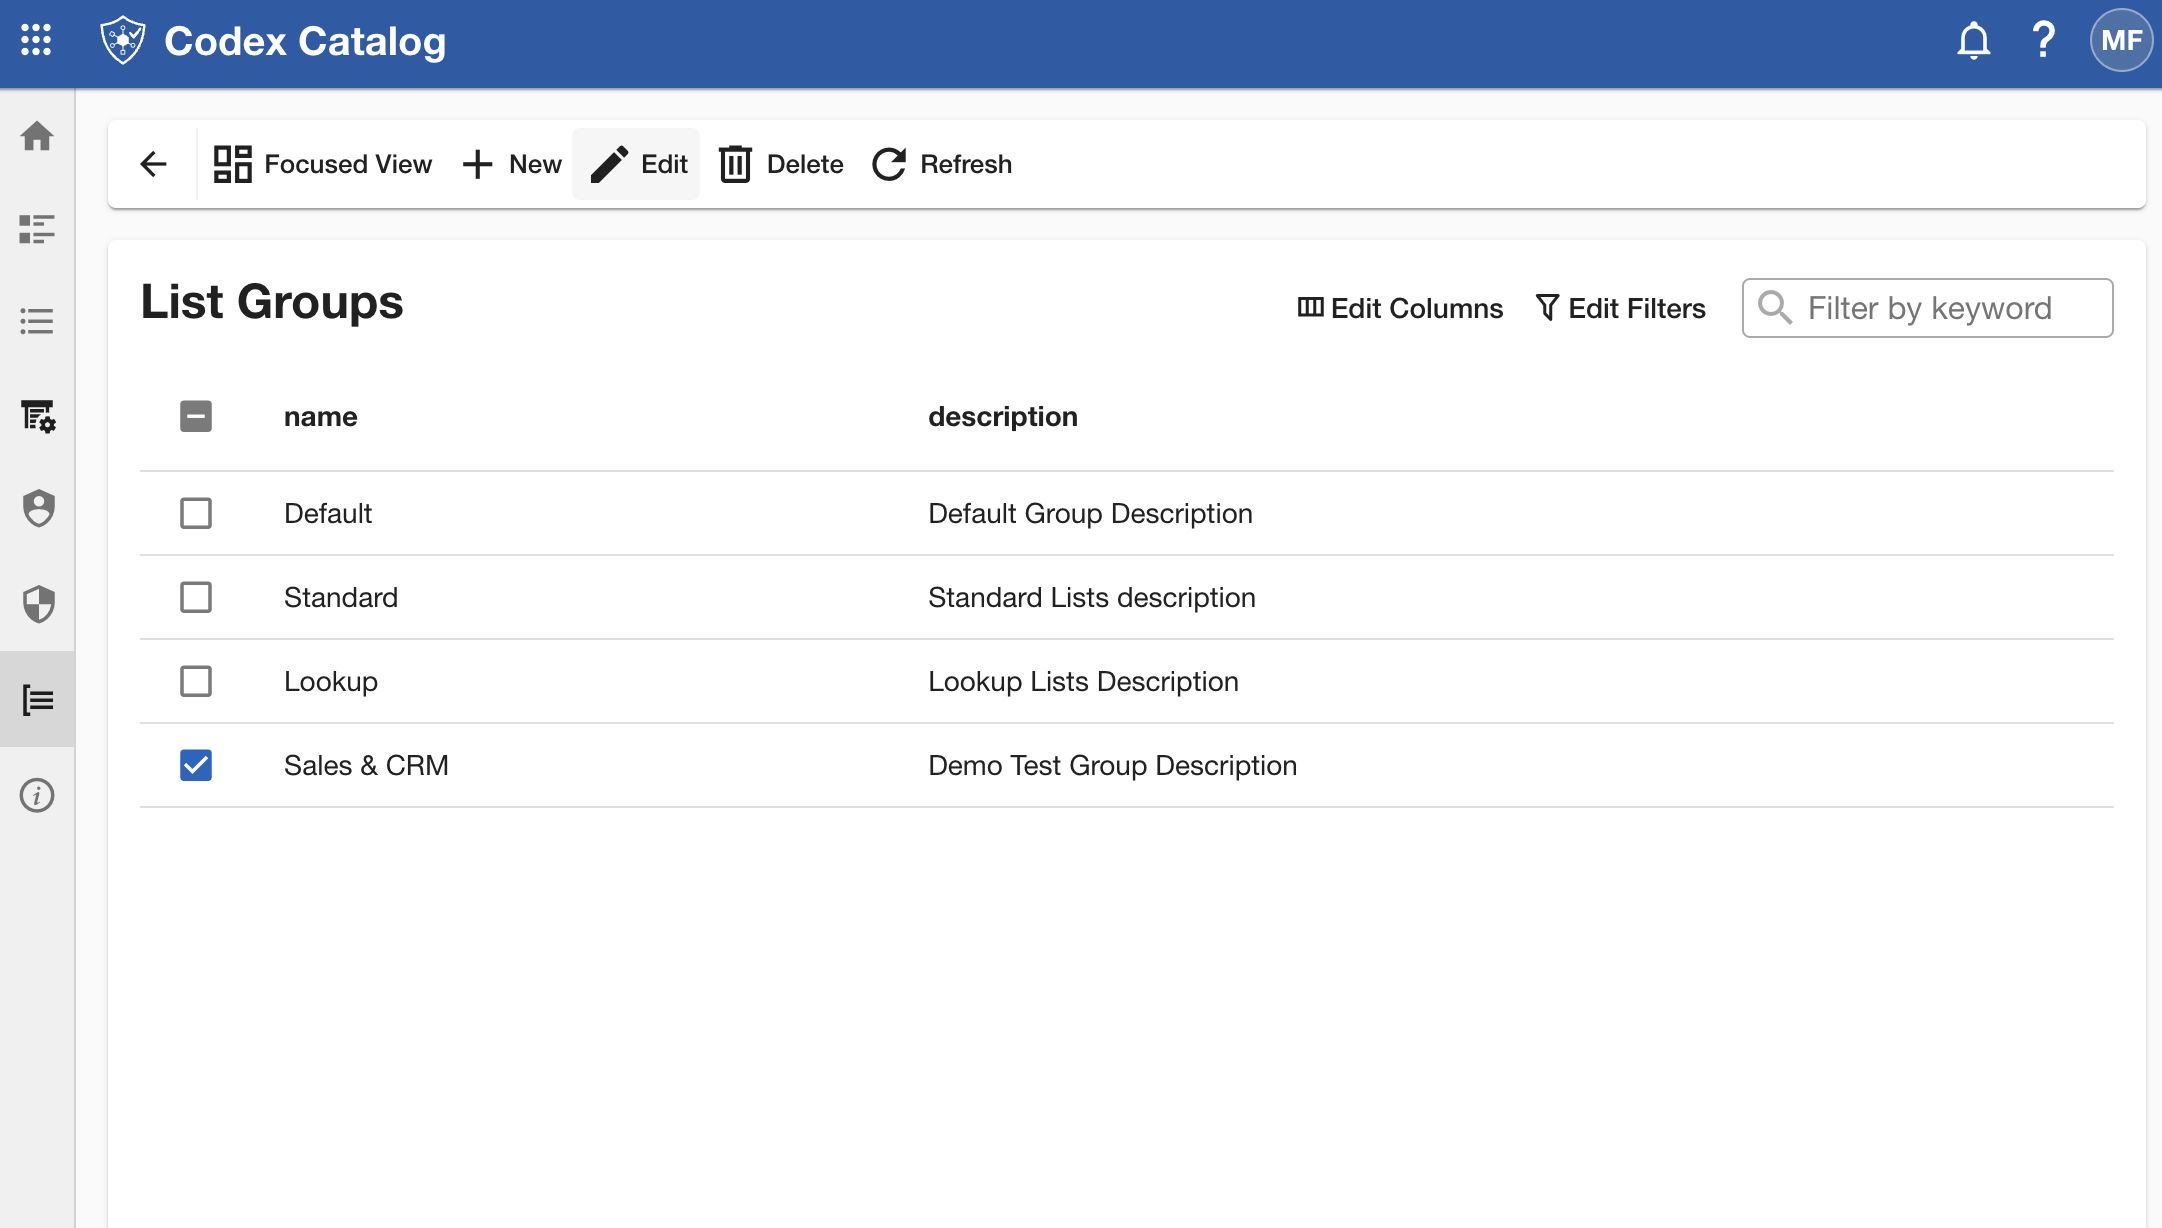
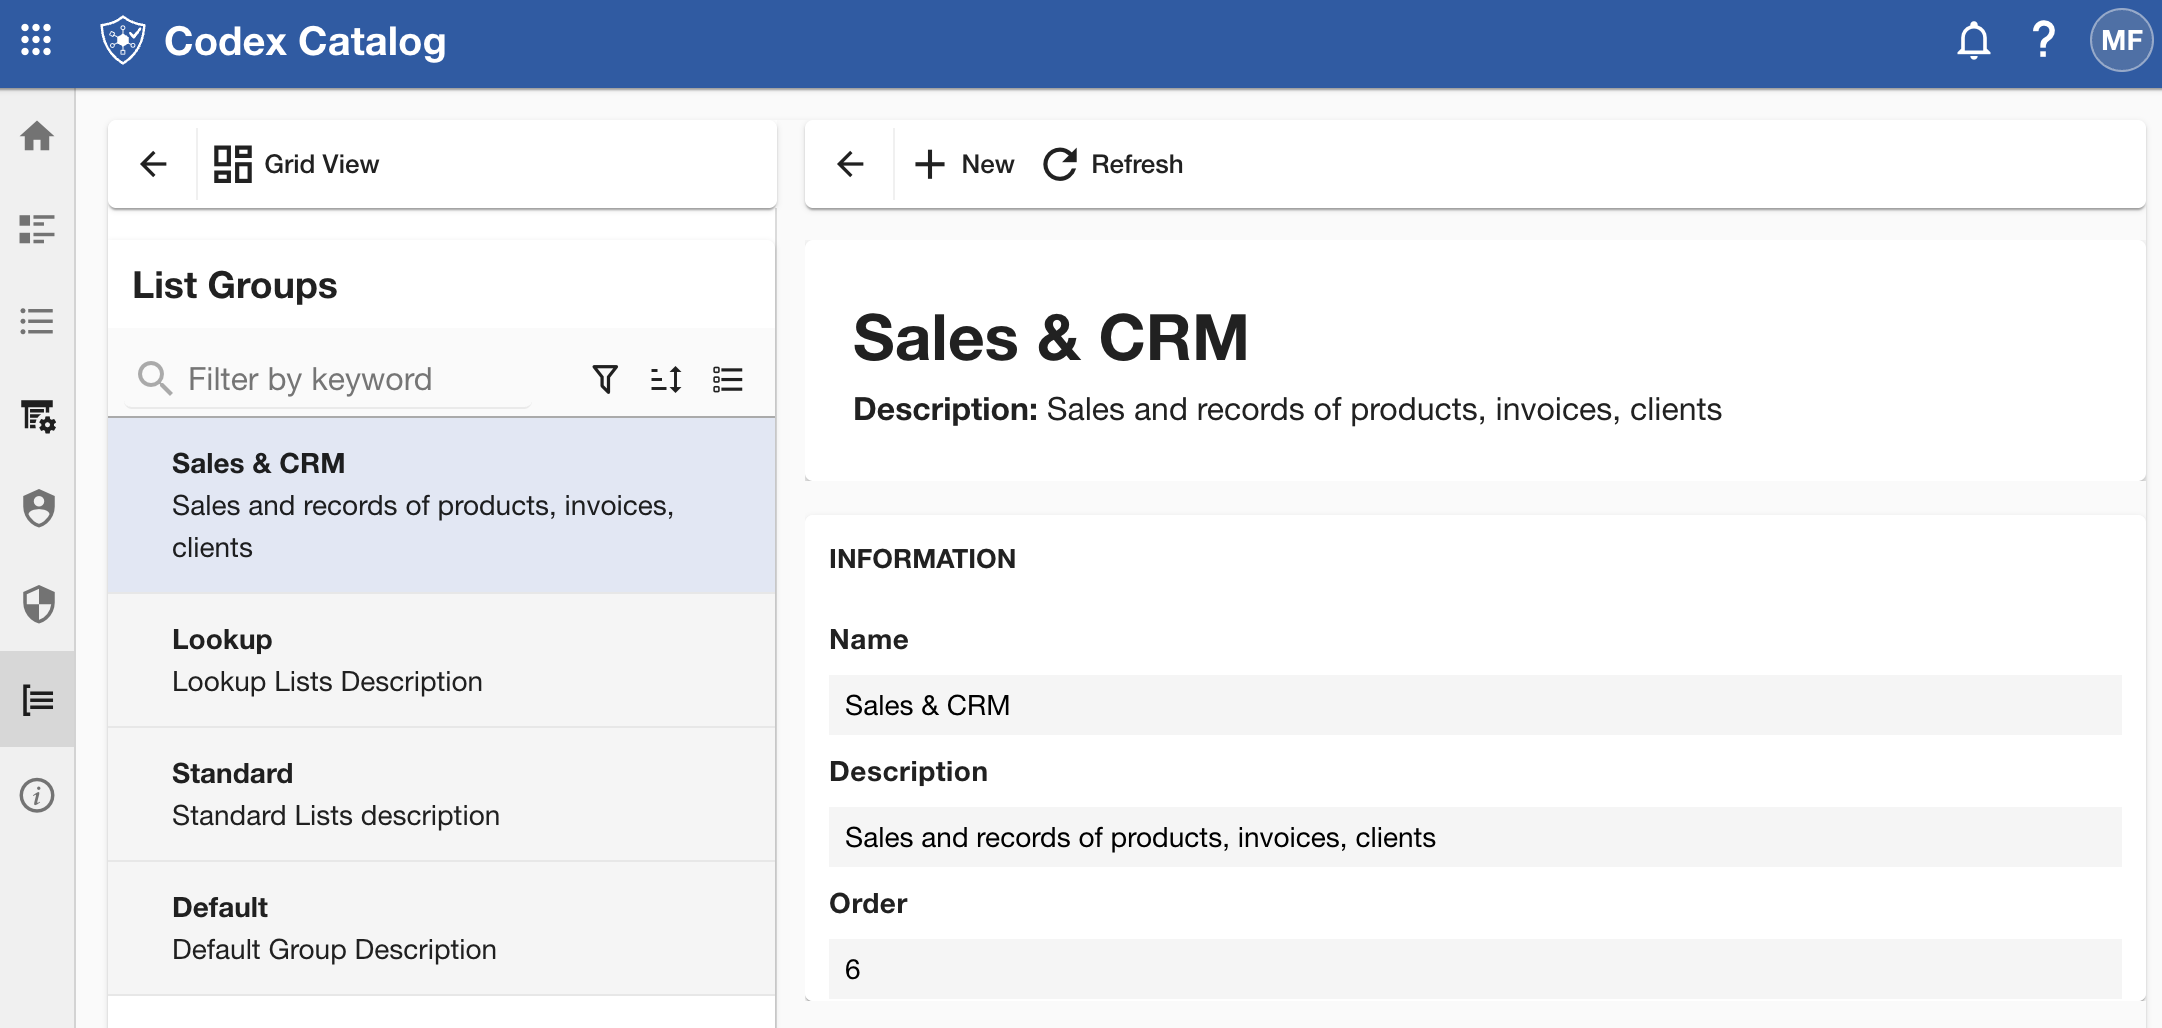
View List Groups
You can view all existing groups in the List Groups section.
Depending on your permissions, the available views include:
-
Grid View — Displays all groups in a table format, showing key information such as Name, Description, and Order.
-
Focused View — Displays a list of all groups in the left pane and the details of the selected group in the right pane.
Use the multiple options in the View Toolbar to quickly locate specific groups.
Sort your list groups
In Grid View, you can use the arrow icons on the right side of each column header to quickly sort the displayed groups.
The arrow icon is hidden. Hover over the field to make it visible.

Click the arrow to sort the lists by the desired field — in ascending order (up arrow) or descending order (down arrow).
In Focused View, sorting arrows are not available. However, you can still apply sort options in the left pane.
Search a list by keyword
Use the Search bar in the View Toolbar to quickly locate specific groups.
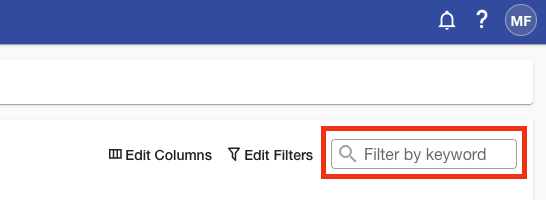
The search applies across all visible columns.
Filter groups
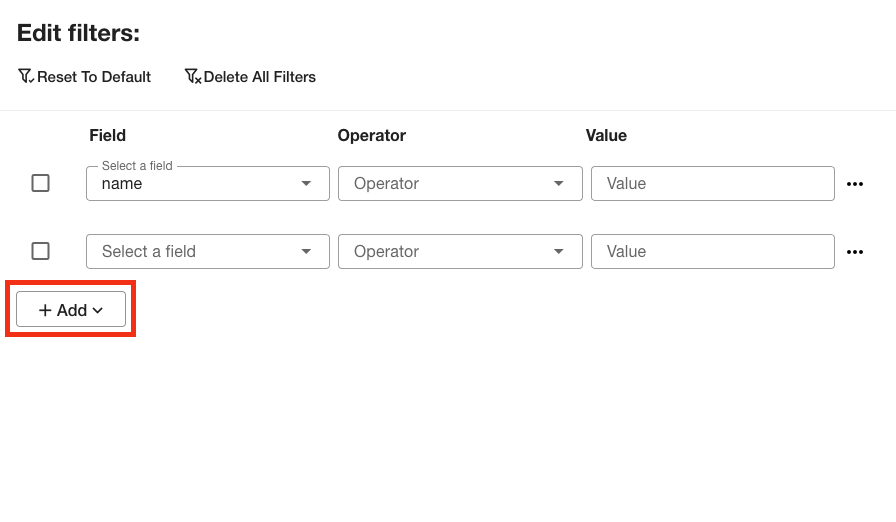
Use the Edit Filters in the View Toolbar to quickly locate specific groups.
Clicking on this option will display a menu where you can:
- Select a Field.
- Choose an Operator (e.g., equals / not equals, contains / not contains, begin with / not begin with).
- Enter a Value to filter by.
You can add multiple conditions by clicking + Add, and then applying the changes.
To remove an added field, click the three-dot menu on the right side of the field, then select Delete.
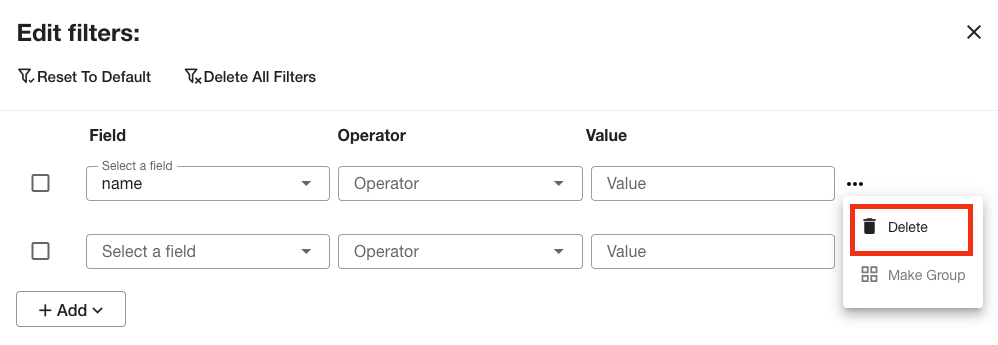
At the top of the panel, you will also find options to Reset to Default to start over, or Delete All Filters at once.
When you have finished configuring your filters, click Apply to update the filters.
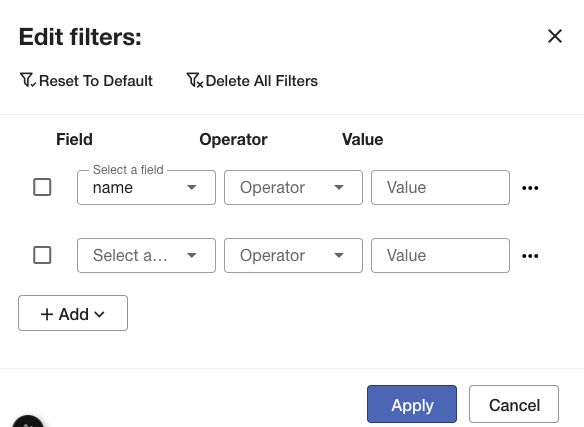
If you want to exit without applying changes, click Cancel to close the panel.
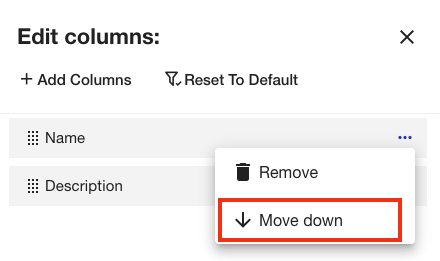
Customize View Columns
This option is available only in Grid View.
Use the Edit Column menu in the View Toolbar to quickly locate specific groups.
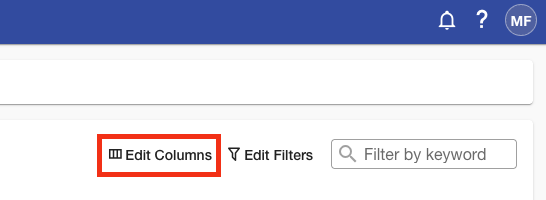
Once there, you will be able to customize which attributes are shown in the table.
You will see a side menu toggle on the right side of the application.
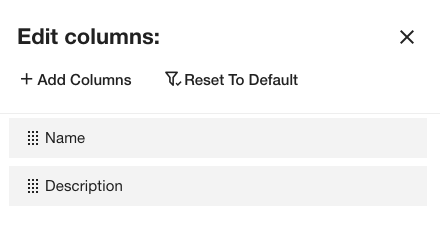
In this menu, you can:
- Add columns: click on + Add Columns and check the box next to the attributes you want to display. If you don’t see an attribute you are looking for, use the Search bar at the top of the panel. Once selected, click Add at the bottom (or Close to exit without changes).
-
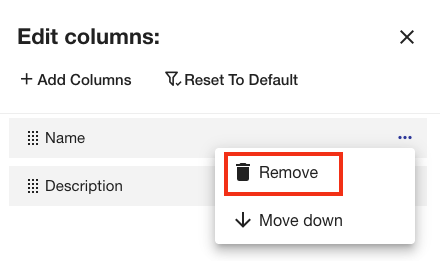
Hide a column: hover over the one you want to remove; a three-point menu will appear. Click on it and select Remove.
-
Reorder columns: You can reorder fields by dragging and dropping them, or by opening the three-point menu and choosing Move Up or Move Down.
When you finish, click Apply to update the table, or Cancel to discard your changes.
The option Reset to Default restores the original column layout.